Have you tried sashiko? This simple but beautiful form of Japanese embroidery has become very popular over the last few years. Many people find sashiko highly addictive! But you might not be aware of the history of sashiko, what it was used for, and how to do it correctly.
History of Sashiko

Sashiko originated about 400 years ago as a means of keeping warm and preserving clothing. In rural, northern Japan, winters were harsh and many people were extremely poor. They relied on producing their own clothing from hemp (cotton was prohibitively expensive for everyday garments) and were restricted from wearing certain colours, so used indigo dye as it was easily grown and was thought to protect against insects.
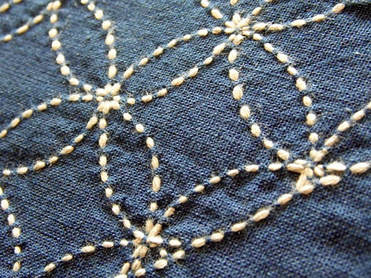
Putting two or more layers of cloth together and sewing with running stitch creates small pockets of air in the clothing, which trap warmth. Many beautiful, geometric patterns were stitched in undyed thread to create the classic 'cream on blue' look we associate with sashiko today. As well as being beautiful, this was also very practical as women would often stitch sashiko on dark evenings and the contrast meant they could see what they were doing!
Since an item of clothing sometimes had to last for three generations, dense stitching helped preserve the fabric, as well as providing a means of repairing with patches.
Sashiko fell out of favour in the 20th century as Japanese people began to wear Western clothes and did not want to be reminded of how poor their families once were. However, recent years have seen a revival of interest as people around the world have seen sashiko on the internet and want to have a go! In Japan, sashiko has also become more popular as a craft hobby. Interestingly, people in the West tend to want their sashiko to look 'traditional' and usually choose cream thread and indigo fabric, whereas in Japan this looks a bit 'old fashioned', so different coloured fabrics and threads are becoming more popular!
How to do it

Sashiko is basically just a decorative running stitch, but there are a few things to bear in mind which make sashiko stitching unique. It's easiest to start with a pre-printed design because these have the stitch lengths marked on, so you really can't go wrong!
If you do want to try marking your own design onto fabric, you need a fabric with a slightly open weave (such as linen or linen mix). Sashiko superstar Susan Briscoe recommends our plain fabric which is 100% cotton. There are free sashiko patterns available to download if you search online. We also stock chacopy transfer paper (chaco paper) which you can use with an old Biro or scoring tool to transfer your design.
If you want to draw on your own design from scratch and learn how the patterns are formed, I would really recommend Susan Briscoe's book The Ultimate Sashiko Sourcebook which goes into much more depth about the history and applications of sashiko, as well as explaining how to stitch each pattern 'properly', with lots of project ideas and a pattern directory.
"But I just want to have a dabble!"

If you're impatient like me and you just want to have a go in the quickest and easiest way possible and get great results first time, I would recommend trying a pre-printed panel. These small projects are approximately 12" square and come as a wide strip, half is printed and half plain. You can either stitch through the two layers together (see below), or just stitch the printed layer and use the plain bit for a backing.
Once you've sewn the sashiko, wash the fabric in warm, soapy water and any remaining printed lines will magically disappear (for this reason, NEVER wash a printed panel before you stitch!!!). The completed panel can be made into a bag, cushion cover, place mat etc. It looks stunning if you add some other fabrics for a border.
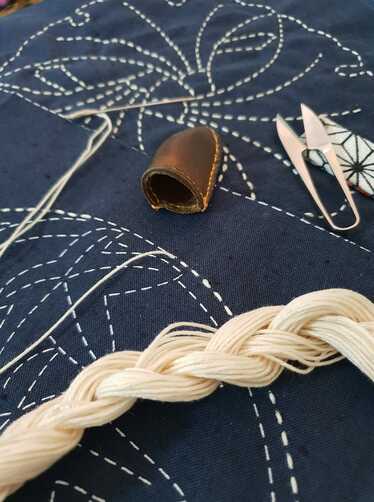
You need a 20m skein of thread to complete one panel, but of course you can use different colours or even variegated thread if you prefer. It helps to have a special sashiko needle, as these are very sharp whilst having a large eye to accommodate the thick thread, and they do not bend.
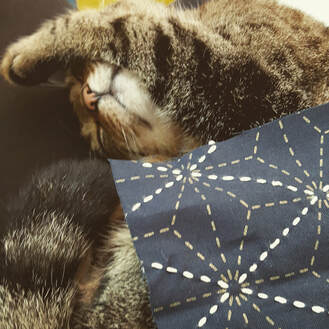
(I hope you like this picture of Nutmeg 'helping' me stitch a sample. I think she was hoping it would be a quilt for her)
Japan Crafts Sashiko Kit Instructions
Our sashiko kits are fairly straightforward but here are a few pointers to help you get started. Please bear in mind there are several ‘right’ ways to do sashiko, so if you have heard of/learned a different way, that may well be ‘correct’, too!
I would love to see your sashiko projects! If you don't mind me sharing them on the Japan Crafts social media pages, please email pictures to [email protected]
Once you've sewn the sashiko, wash the fabric in warm, soapy water and any remaining printed lines will magically disappear (for this reason, NEVER wash a printed panel before you stitch!!!). The completed panel can be made into a bag, cushion cover, place mat etc. It looks stunning if you add some other fabrics for a border.
You need a 20m skein of thread to complete one panel, but of course you can use different colours or even variegated thread if you prefer. It helps to have a special sashiko needle, as these are very sharp whilst having a large eye to accommodate the thick thread, and they do not bend.
(I hope you like this picture of Nutmeg 'helping' me stitch a sample. I think she was hoping it would be a quilt for her)
Japan Crafts Sashiko Kit Instructions
Our sashiko kits are fairly straightforward but here are a few pointers to help you get started. Please bear in mind there are several ‘right’ ways to do sashiko, so if you have heard of/learned a different way, that may well be ‘correct’, too!
- Sashiko is basically just using a running stitch to create the design, so follow the stitches marked, in and out.
- The pre-printed designs wash out with water, so don’t wash your fabric before you start!
- Although traditional sashiko often uses a doubled thread, it is easier to just use a single thread to start with. You may like to highlight some areas of the design with a doubled thread to make them stand out – that’s up to you.
- Start and finish each thread with a knot on the back of the fabric (there are several ways of starting and finishing, but this is the easiest).
- You can stitch through both layers of fabric, but this is trickier and requires hiding or 'popping' your knots between the layers. I would recommend stitching through just one layer of fabric if you've never done this before, and using the other half as a backing later.
- You should try to load several stitches on your needle at once, to stop the thread from fraying. The needles are long so you can pleat 20 or more stitches on at a time if you are stitching a straight line! Gently ease the thread through and smooth out the fabric after each needle-full of stitches. For this reason, don’t use an embroidery hoop for sashiko.
- Don’t pull your thread too tightly – it’s better to leave a bit of excess thread on the back of the work, especially on curves and corners, to prevent the fabric scrunching up.
- Try not to make big ‘jumps’ with your thread on the back of your work. Work out an economical path, and if you have to travel between areas, knot your thread and cut it rather than jumping. With the traditional, geometric designs, there are small, numbered arrows on the packet of the fabric which show you how to stitch the design correctly.
I would love to see your sashiko projects! If you don't mind me sharing them on the Japan Crafts social media pages, please email pictures to [email protected]
Sashiko Videos
These handy videos (in Japanese) give a good visual tutorial in handling thread, stitching, and completing the 'shippou tsunagi' design correctly. Reproduced with permission from Olympus.
|
|
|
|
|
|
SHOP SASHIKO
